Sticky Candy and How to Style It

I’ve been styling my way through pounds and pounds of hard candies lately for Iconic Candy, a family-owned company that brings back beloved discontinued candies and lets us indulge our nostalgia for the flavors of our youth. The brand I’m working on is one of my favorites from back in the day — Creme Savers! (Fwiw, strawberry is still my favorite, but to be honest, orange isn’t far behind.)
Because there’s no food prep on this project beyond slicing fruit or pouring cream, I’ve been handling the food and prop styling on my own, along with the photography. And what a headache it was because hard candy gets STICKY! It’s not so bad when I first open the package, but after the unwrapped candies sit on set for even a few minutes, they absorb moisture from the air (and get worse over time), sticking to 1) each other, 2) my gloved hands, 3) tweezers, and 4) the set surface, which was originally paper.
So, basically everything.
Tackling that last problem, I bought a sheet of matte gray Formica, which may be my new favorite surface to work with. It wipes clean, weighs next to nothing, and is truly matte. What a godsend! But what to do about the stickiness itself?
A Google search turned up exactly no advice that I could find, apart from candy makers suggesting rolling hard candies in cornstarch or powdered sugar and storing them in an airtight container, but that advice was for consumption, not food styling. Apart from being impractical, it would mar the beauty of the candies and create a nightmare retouching scenario.
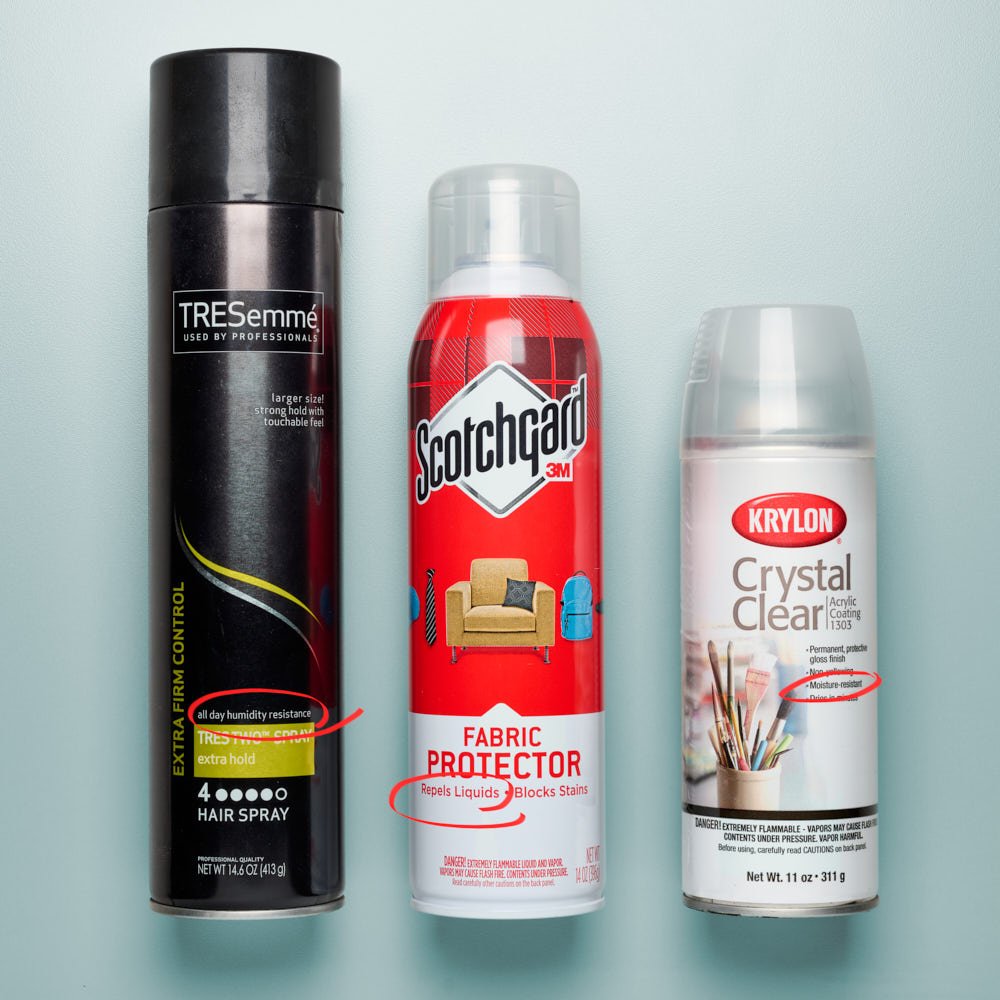
So I decided to conduct an experiment with some items I already have in the house: TRESemmé hair spray, Scotchgard Fabric Protector and Krylon Crystal Clear Acrylic Coating. The hair spray offers humidity resistance and a fine mist, both of which my hair appreciates, and I suspected this sticky product would as well. I keep Scotchgard on hand to coat food items on set to keep liquids from soaking into them (like pancakes with syrup), and coating a glass in Crystal Clear is the first step to getting a beautiful beverage image with condensation on the glass. I thought one of these would surely do the trick for me, and I was right!
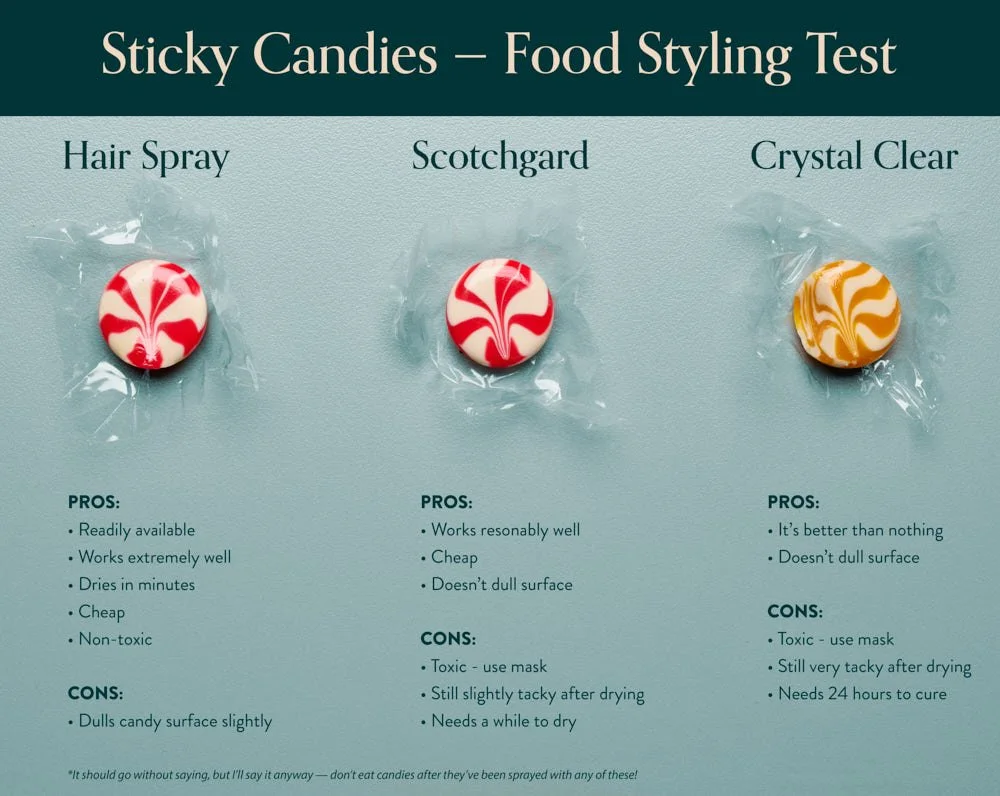
The winner — for several reasons — was the hair spray! I’ll admit it was a late addition to my test and not something I expected perform as well as it did, but I’m so happy it occurred to me to use it. Apart from performing the best by far of the three sprays, it has a few other advantages:
Most of us already have a can of hair spray in the house
If you don’t, it’s easy enough to find
It dries within minutes
It’s inexpensive
It’s non-toxic
The only drawback is that it dulled the finish slightly, but that wasn’t a concern, as I’d only planned to coat the bottom of the candy anyway. I definitely recommend this brand, but think any other fine aerosol hair spray with anti-humidity protection should work.
Scotchgard came in a distant second. It took a lot longer to set up — close to an hour before I noticed any major reduction in stickiness — and it simply didn’t perform as well as the hair spray. I’d use it if I couldn’t get my hands on hair spray for a reason I can’t begin to imagine, but the fact that you should wear a mask while using Scotchgard coupled with its drying time make it a no-go for me.
And I think I’ll just continue to use Crystal Clear for its intended purpose in my studio. No need to waste something that’s harder to find, more expensive, takes longer to dry/cure, is toxic, and doesn’t work as well as my number 1!
If there are any food photographers or stylists reading this, please let me know if you have a secret weapon for this type of styling. I’m always happy to add to my toolbox.